Using a compass for us Scout folk is second nature – we teach this skill to Scouts from the ages of 6 up to 18! It is the foundation for navigating with just a compass and map. For those who aren’t involved in Scouts, using a map and compass can seem a bit pointless when you can use a smartphone with a built-in map and compass to help you get from A to B. But learning how to use a compass is a skill that enables you to explore nature and trails whilst completely disconnecting from technology! Plus when you don’t have a signal, you’ll still be able to nav your way to your destination.
Why do you need to know how to use a compass and map?
Learning how to use a compass and map can be useful in so many different situations. The main one that comes to mind is when walking and you reach a junction in your path with multiple paths you could take and you are not sure which one to pick. Using a bearing can help you confirm the path you should pick.
Or, your path that appears clearly on the map doesn’t seem to be easily defined when you reach it. Using a bearing can help you keep walking in the right direction.
The Compass:
The first step in learning how to use a compass is learning about all the different parts of the compass and what their function is. This diagram shows the main parts:
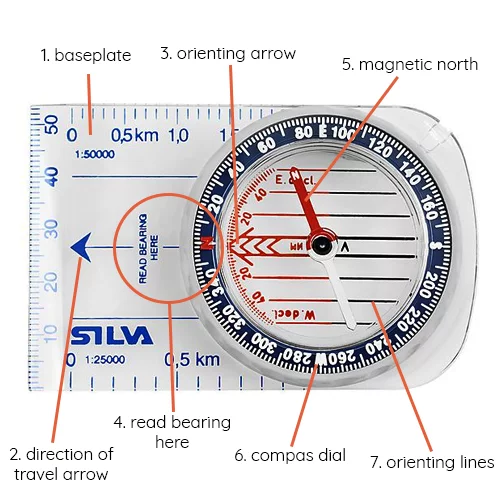
- Baseplate – is the main body of the compass. It has lines and rulers on the baseplate to help you measure distances.
- Direction of Travel Arrow – this arrow shows the direction you need to be travelling or your intended direction of travel on a map.
- Orienting Arrow – this arrow is fixed to the compass dial (6) it is aligned to the north on this dial. You rotate to align this to the north on the map to take a bearing.
- Read Bearing Here – once you have followed the steps to take a bearing, this is where you would read the measurement. The
- Magnetic North – this is the compass needle. It floats in liquid and can rotate freely. The red end always points to the magnetic north.
- Compass Dial – this dial contains the compass needle (5) and can be rotated. This is how you align the orienting arrow (3) to the map. It’s marked in degrees, going from 0 to 360, making a full circle. North is 0, South is 180, East is 90 and West is 270.
- Orienting Lines – these lines are on the dial too. They are here to help you line up the orienting arrow (3) to the north on the map using the map girds.
How to take a simple bearing using a map and compass:
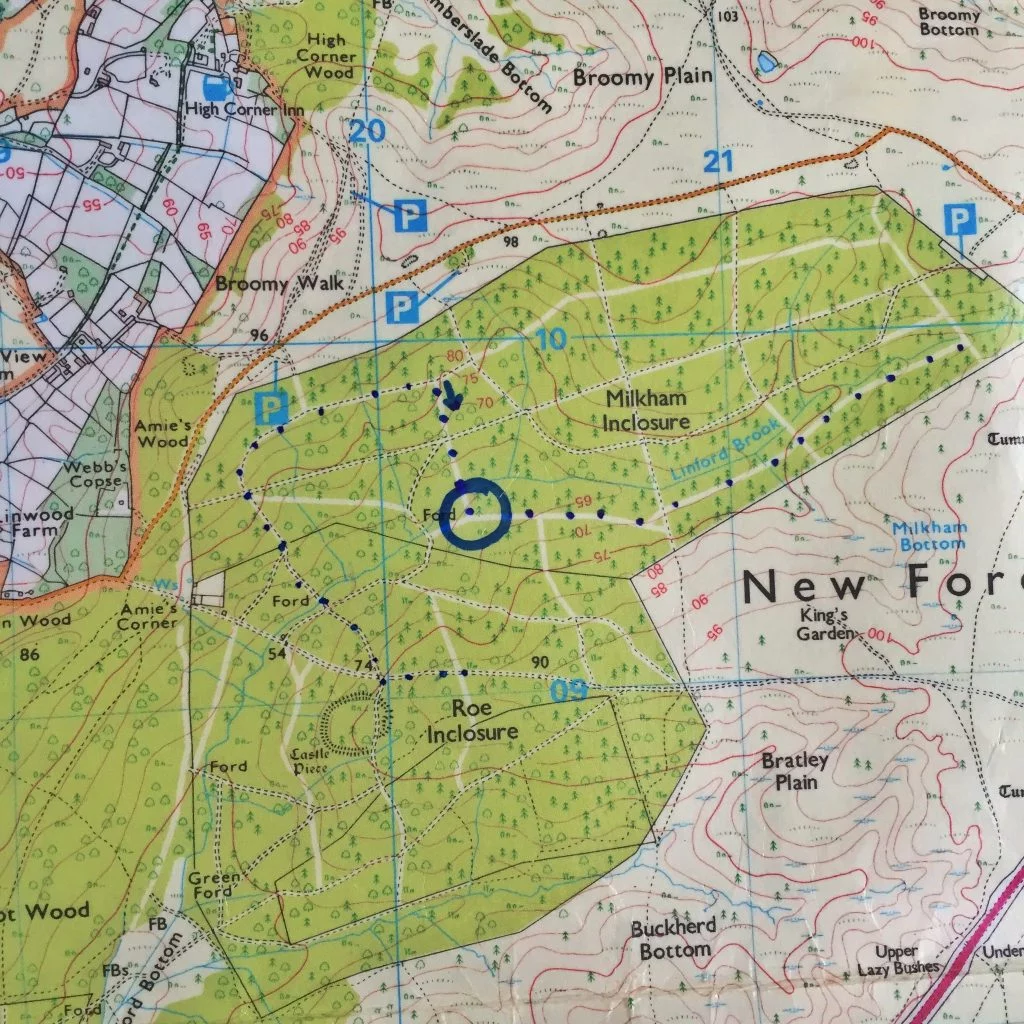
1. Locate yourself on the map.
I am starting in the circle and want to travel down the dotted line to the right.
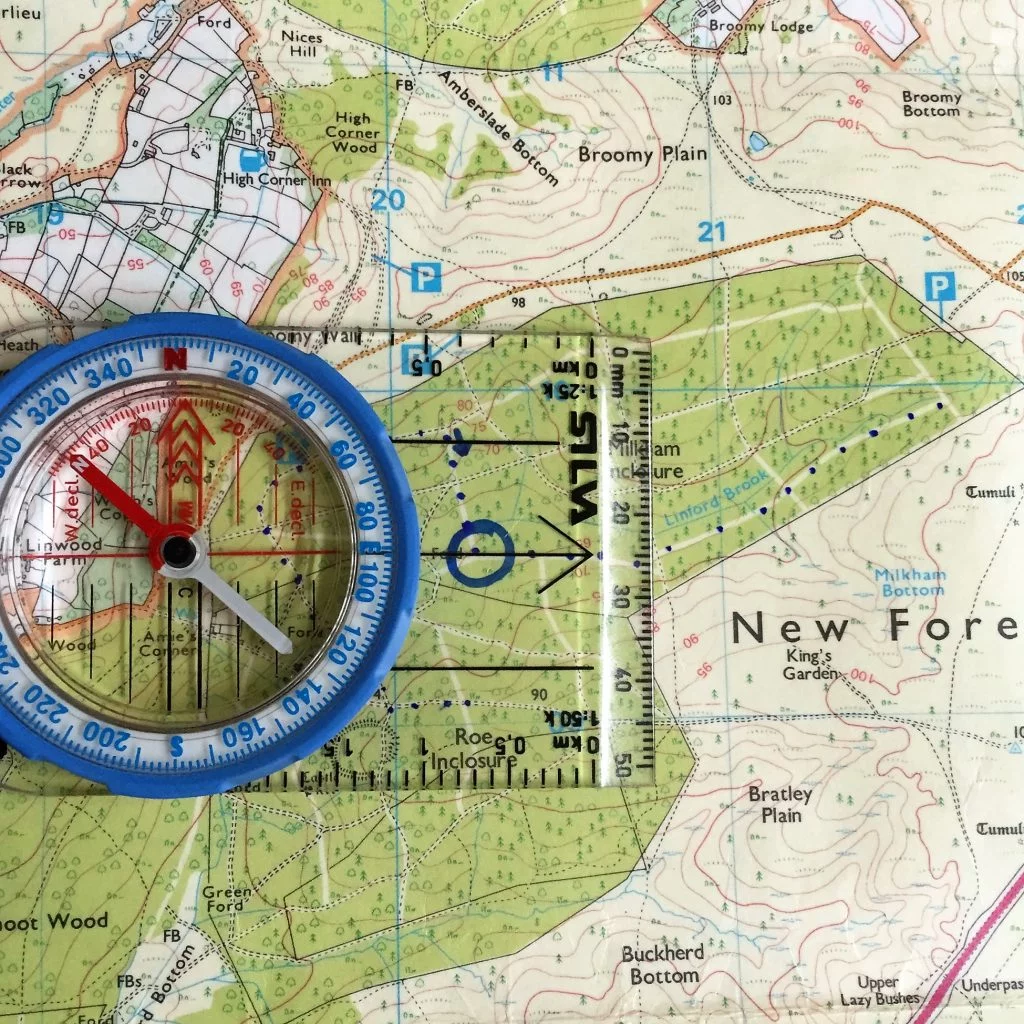
2. Line up the direction of travel arrow (2) on the path you want to travel along.
I want to walk down my dotted line.
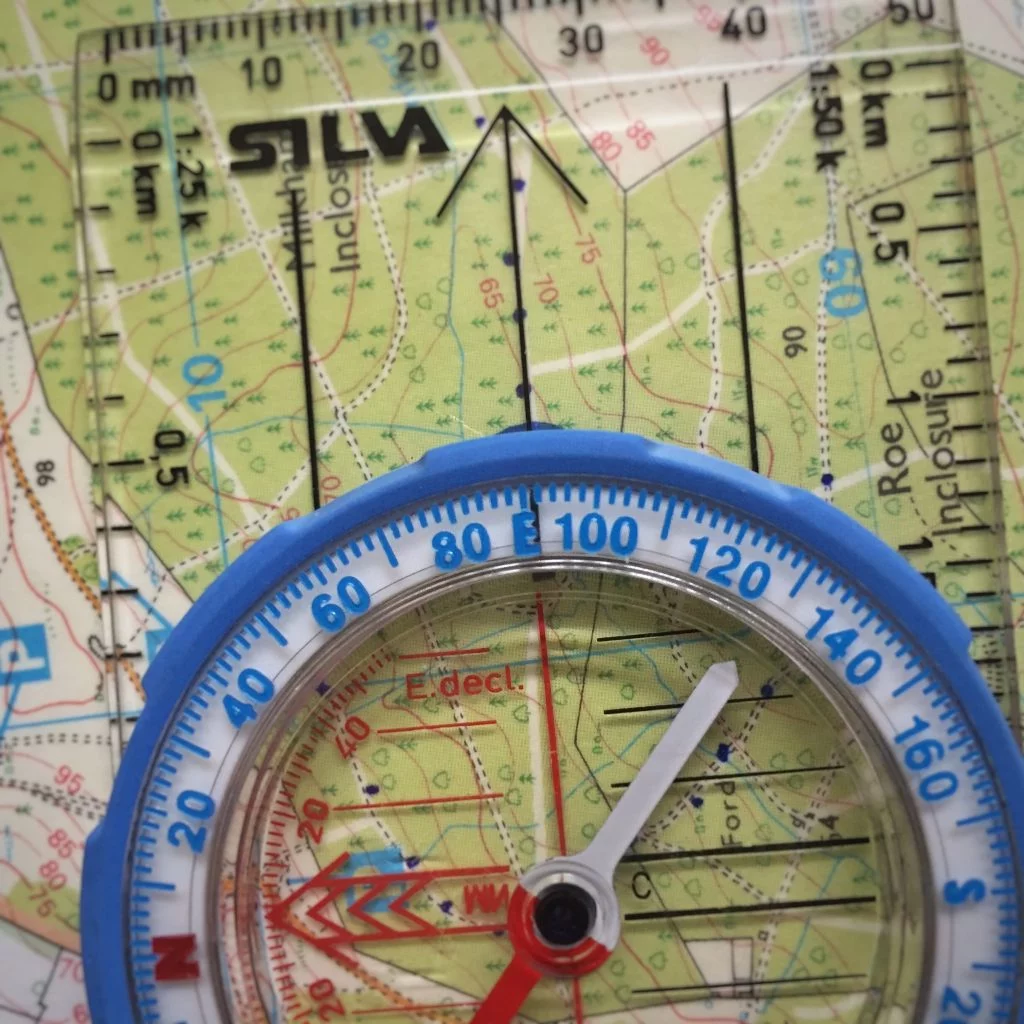
3. Turn the compass dial (6) so the orienting arrow (3) is pointing to the north of the map.
You can use the orienting lines (7) to help you line it up to the grid on the map.
4. Now you have a bearing. The number at the top of your compass, lined up with the direction of travel arrow (2) is your bearing (4).
My bearing to travel along is 92.
How to follow your bearing when walking:
1. Take your bearing using your map.
Follow the previous steps. My bearing is 92. Keep the dial exactly where it is, you do not need to move the dial from now on.
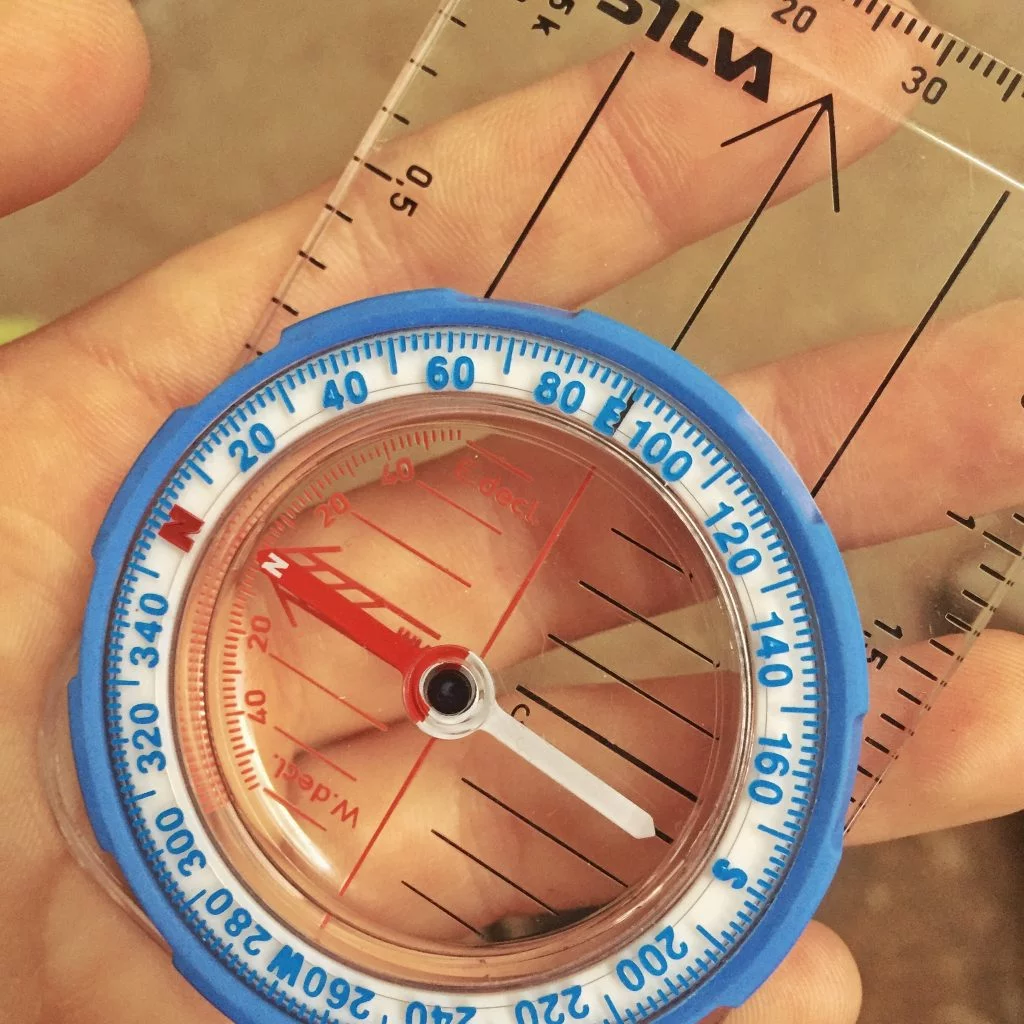
2. Line up the orienting arrow (3) with the magnetic north (5).
Do this by physically moving the whole compass, until they are lined up. Don’t move the dial!
3. Follow the direction of travel arrow (2).
You’ve taken a bearing, lined up the orienting arrow and magnetic north. This now means the direction of travel arrow is pointing in right direction.
PDF How To Use A Compass. Download
We hope you found our guide to navigating using a compass useful, but if you have any other ideas, why not join in the conversation and comment below!
Need a compass or a map? Check out our Kit Store!
We have a handy map finder. Search by map title, national park, trail or location and it will find all the maps you need for your adventure. Find it on the sidebar to your left.
Shop OS Maps | Shop Navigation
Originally published: 19th February 2016 | Updated content: 27th July 2020